As I mentioned in a recent blog post, I have recently got back into painting with soft pastels. After several years of no art in my life at all, and then a few years creating art digitally, it's been fun, interesting and therapeutic to put pastel to paper and see what I can create.
The first thing I realized was that, if I wanted to work in my current studio, I would need better light. My studio is actually the formal dining room of our home (we use the breakfast nook as our dining room).
My studio, which I named "Mockingbird Studio", is in the center of the house and although it's open on two sides to the living room and kitchen, it doesn't get direct light. That was fine when working on the computer, not so useful when working on an easel.
I started looking for lamp setups for an art studio and found what I needed in the Daylight Lamp. It was a bit pricey, but I had a birthday coming up and I put it on my wishlist.
My wonderful husband bought it for me for my birthday and we rearranged my desk a bit to enable me to use it and my easel next to my computer.
This will enable me to view video tutorials while I'm working alongside at my easel. I love it!
Anyway, on to my latest artwork (sneak preview above).
On the way home from seeing my horse at the barn last weekend, I caught sight of a lovely view that I really wanted to try and paint in pastels. If I had my camera with me, I probably would have stopped and taken a reference photo. As it was I tried to commit it to memory as I sped by and when I got home, I did something I haven't done in decades - I sketched the scene!
As you can tell, I'm not a sketch artist, but I was able to get enough of a feel for the scene that today I decided to try and do it in pastels.
I simplified it by only putting in two round hay bales, instead of the 12 I had in my sketch which I think would have been a) impossible to do and b) made the picture look too "busy".
This is the first one I've tried to do from scratch, without following a tutorial or a lesson in a book.
Naturally, I can see things now that could/should be changed to make it less amateurish but I think that on the whole, I'm pretty happy with the way it came out.
Saturday, July 26, 2014
Sunday, June 8, 2014
The Great American Road Trip
I'm originally from England and although I have lived in the U.S. for over 30 years, up until last year I had actually seen very little of it.
That was when my husband decided to plan a cross country road trip for us. It really was the trip of a lifetime and we came home with a treasure chest of memories and hundreds of photographs.
Our first stop was Carlsbad Caverns in New Mexico. The caverns were spectacular, to say the least!
It was a first test for my new camera, and although not all of the photos were successful, there were a few gems among them. I thought this particular formation, The Chinese Theater, was especially photogenic.
We couldn't go on a Great American Road Trip without visiting the Grand Canyon could we?
Unfortunately it was a bit hazy while we were there and for most of the day we didn't see the canyon in all it's glory. However, my husband booked us on the "Sunset Tour" and while the driver was concerned that we might not be lucky, in actual fact, once the sun got down to the horizon, it broke out underneath the cloud layer and we were treated to some spectacular views.
I was worried that our drive across Nevada might be a bit dull - miles upon miles of desert terrain. However, it was far from it. For a start, the "Great Basin" as it is called, is surrounded on all sides by mountains, which we don't have down here in my area of Texas. And then we kept seeing these dust devils around us. I was fascinated by them, and became determined to get a photo.
Let me tell you, it's not easy to get a photo of a dust devil through the bug-spattered windshield of a car at 55 mph, but after numerous failures, I finally got a good photo.
Later in our trip, we visited Bryce Canyon in Utah. Interestingly, the 3D graphics programs my husband introduced me to when we met is called Bryce and was actually named after Bryce Canyon.
Below is the promo image from Bryce 5.5, actually created in the program itself, and below it is a photograph I took from Ponderosa Point at Bryce Canyon.
Can you see where the inspiration for the promo image came from?
Our trip eventually took us across the Sierras to the West Coast. On the way, we stopped at beautiful Lake Tahoe. This is one place I have been before and can never get tired of it. I haven't even been there in winter yet!
This is one of many photos I took as we went on a drive around the lake. I call it "Lake Tahoe Through the Trees.
I'm rather proud of this photograph as it recently earned a Special Recognition in the 4th Annual "Landscapes" Art Competition held by the Light, Space and Time Online Art Gallery. This was quite an accomplishment as there were 587 entries from around the world!
Everywhere we went, in addition to being committed to taking the best photographs we could, Eric and I found ourselves getting ideas and inspiration for digital landscapes to create in Vue, the 3D graphics software we now use.
Below is an image rendered in Vue of Emerald Bay at Lake Tahoe. I didn't create this - it was a sample scene that came with Vue when I purchased it, to show the power of the program. All I did was click on the render button, so I can't take any credit.
Below is a older Vue render inspired by my first trip to Lake Tahoe, several years ago. I created this from scratch and of course I can find faults with it now. But on the whole, I'm rather pleased with how it came out.
Some of my best photographs from The Great American Road Trip are available as prints and art cards on my website at www.jaynewilsonart.com and I will probably add some more in the coming weeks.
That was when my husband decided to plan a cross country road trip for us. It really was the trip of a lifetime and we came home with a treasure chest of memories and hundreds of photographs.
Our first stop was Carlsbad Caverns in New Mexico. The caverns were spectacular, to say the least!
It was a first test for my new camera, and although not all of the photos were successful, there were a few gems among them. I thought this particular formation, The Chinese Theater, was especially photogenic.
We couldn't go on a Great American Road Trip without visiting the Grand Canyon could we?
Unfortunately it was a bit hazy while we were there and for most of the day we didn't see the canyon in all it's glory. However, my husband booked us on the "Sunset Tour" and while the driver was concerned that we might not be lucky, in actual fact, once the sun got down to the horizon, it broke out underneath the cloud layer and we were treated to some spectacular views.
I was worried that our drive across Nevada might be a bit dull - miles upon miles of desert terrain. However, it was far from it. For a start, the "Great Basin" as it is called, is surrounded on all sides by mountains, which we don't have down here in my area of Texas. And then we kept seeing these dust devils around us. I was fascinated by them, and became determined to get a photo.
Let me tell you, it's not easy to get a photo of a dust devil through the bug-spattered windshield of a car at 55 mph, but after numerous failures, I finally got a good photo.
Later in our trip, we visited Bryce Canyon in Utah. Interestingly, the 3D graphics programs my husband introduced me to when we met is called Bryce and was actually named after Bryce Canyon.
Below is the promo image from Bryce 5.5, actually created in the program itself, and below it is a photograph I took from Ponderosa Point at Bryce Canyon.
Can you see where the inspiration for the promo image came from?
Our trip eventually took us across the Sierras to the West Coast. On the way, we stopped at beautiful Lake Tahoe. This is one place I have been before and can never get tired of it. I haven't even been there in winter yet!
This is one of many photos I took as we went on a drive around the lake. I call it "Lake Tahoe Through the Trees.
I'm rather proud of this photograph as it recently earned a Special Recognition in the 4th Annual "Landscapes" Art Competition held by the Light, Space and Time Online Art Gallery. This was quite an accomplishment as there were 587 entries from around the world!
Everywhere we went, in addition to being committed to taking the best photographs we could, Eric and I found ourselves getting ideas and inspiration for digital landscapes to create in Vue, the 3D graphics software we now use.
Below is an image rendered in Vue of Emerald Bay at Lake Tahoe. I didn't create this - it was a sample scene that came with Vue when I purchased it, to show the power of the program. All I did was click on the render button, so I can't take any credit.
Below is a older Vue render inspired by my first trip to Lake Tahoe, several years ago. I created this from scratch and of course I can find faults with it now. But on the whole, I'm rather pleased with how it came out.
Some of my best photographs from The Great American Road Trip are available as prints and art cards on my website at www.jaynewilsonart.com and I will probably add some more in the coming weeks.
Saturday, May 31, 2014
New Tricks - Wherein I try out a new artistic endeavour
Many years ago, while still living at home in England with my parents, I enjoyed painting. Nothing fancy, you understand. Just using reference photos to do small painting of English cottages and rural scenes for my own personal enjoyment.
I've never had any formal art training, other than the basic stuff learned while taking my Art "O" Level (G.C.E.) at school.
Then I got married and moved to the U.S, and art just wasn't part of my life anymore for many years.
Since then, I remarried and my current husband introduced me to the world of digital art. This worked out great because we had opened our hearts and our home to a number of long-haired felines who like to get into everything. I could only imagine what a mess it would create if a cat went blundering through my paint pots while I was in the middle of something.
Working on my computer, I can just turn it off when I'm done and not have to worry about having to "cat proof" everything.
I'm very happy with my digital art and photography, but I've often wondered if I could actually still create art with more traditional media - watercolors, oils, pastels.
Earlier this week, one of my Facebook friends Judy Adamson, who is an artist living in Wales, posted a link to one of her old blog posts: Five Simple Steps to Painting in Pastels.
I was inspired! It looked like fun and I realized the cats wouldn't be able to knock over any pots of paint or water.
So this morning after breakfast, Eric and I found ourselves in the art department at the local hobby store, perusing their offerings. I quickly picked up a pack of pastels, a pad of pastel paper, a kneaded eraser and some tortillons.
Then I started wondering where on earth I was actually going to do this painting with pastels.
My "studio" is pretty much taken up with my computer, books, binders and assorted other stuff. So where would I put an easel? Would I just paint on the dining room table?
My questions seemed to be answered when I saw this easel. It holds art supplies inside and was of a size that could easily fit on my desk - I would just need to scoot my iMac back a bit when using it.
When it's not being used, it could be stored safely away and could even come on the road if I feel like doing some work "en plein air".
Here's a photo of it setup in my studio. I'll probably have to get some better lighting in there but this is what I have for now.
I spent much of the day putting pastel to paper and had a blast (I didn't realize at the time that I could have set the easel to a lower angle for pastel work - shows you what I know)
The work in progress is shown below.
Not a masterwork by any stretch of the imagination, but hey - I'm still learning what angle to put the easel, so what do you expect? LOL.
Resources
Artists Network - Pastel Art Techniques
I've never had any formal art training, other than the basic stuff learned while taking my Art "O" Level (G.C.E.) at school.
Then I got married and moved to the U.S, and art just wasn't part of my life anymore for many years.
Since then, I remarried and my current husband introduced me to the world of digital art. This worked out great because we had opened our hearts and our home to a number of long-haired felines who like to get into everything. I could only imagine what a mess it would create if a cat went blundering through my paint pots while I was in the middle of something.
Working on my computer, I can just turn it off when I'm done and not have to worry about having to "cat proof" everything.
I'm very happy with my digital art and photography, but I've often wondered if I could actually still create art with more traditional media - watercolors, oils, pastels.
Earlier this week, one of my Facebook friends Judy Adamson, who is an artist living in Wales, posted a link to one of her old blog posts: Five Simple Steps to Painting in Pastels.
I was inspired! It looked like fun and I realized the cats wouldn't be able to knock over any pots of paint or water.
So this morning after breakfast, Eric and I found ourselves in the art department at the local hobby store, perusing their offerings. I quickly picked up a pack of pastels, a pad of pastel paper, a kneaded eraser and some tortillons.
Then I started wondering where on earth I was actually going to do this painting with pastels.
My "studio" is pretty much taken up with my computer, books, binders and assorted other stuff. So where would I put an easel? Would I just paint on the dining room table?
My questions seemed to be answered when I saw this easel. It holds art supplies inside and was of a size that could easily fit on my desk - I would just need to scoot my iMac back a bit when using it.
When it's not being used, it could be stored safely away and could even come on the road if I feel like doing some work "en plein air".
Here's a photo of it setup in my studio. I'll probably have to get some better lighting in there but this is what I have for now.
I spent much of the day putting pastel to paper and had a blast (I didn't realize at the time that I could have set the easel to a lower angle for pastel work - shows you what I know)
The work in progress is shown below.
Not a masterwork by any stretch of the imagination, but hey - I'm still learning what angle to put the easel, so what do you expect? LOL.
Resources
Artists Network - Pastel Art Techniques
Saturday, May 24, 2014
The Story Behind "Here Without You"
My husband and I will celebrate our seventh anniversary later this year, but we've actually known each other quite a bit longer than that.
We met in an online chat room, back when they were all the rage, and maintained a long distance relationship for four years, before our wedding in 2007.
During that time Eric introduced me to the digital art programs Bryce and DAZ and, encouraged by his sister, also a prolific digital artist, I got hooked!
"Here Without You" is one of my earlier digital artworks, created in DAZ 3D. I created it on a long night sitting at home alone listening to our special music on iTunes.
Not surprisingly, given the title I finally gave it, I was listening to "Here Without You" by Three Doors Down when I came up with the idea for this piece.
I wanted to convey the longing I myself was feeling, waiting for Eric's next visit or the day we could finally be together forever.
If you look closely, you'll see that she has an actual photograph of my then fiance balanced on her lap -- thanks to the wonders of 3D graphics programs I was able to apply the photo to a small rectangular plane and then position it on her lap like a much loved portrait.
Even now when I look at this piece, it really takes me back to those days and everything it took for us to meet, get together and finally be able to marry.
Not all online relationships work out, but I'm very happy that ours worked out so well.
We met in an online chat room, back when they were all the rage, and maintained a long distance relationship for four years, before our wedding in 2007.
During that time Eric introduced me to the digital art programs Bryce and DAZ and, encouraged by his sister, also a prolific digital artist, I got hooked!
"Here Without You" is one of my earlier digital artworks, created in DAZ 3D. I created it on a long night sitting at home alone listening to our special music on iTunes.
Not surprisingly, given the title I finally gave it, I was listening to "Here Without You" by Three Doors Down when I came up with the idea for this piece.
I wanted to convey the longing I myself was feeling, waiting for Eric's next visit or the day we could finally be together forever.
If you look closely, you'll see that she has an actual photograph of my then fiance balanced on her lap -- thanks to the wonders of 3D graphics programs I was able to apply the photo to a small rectangular plane and then position it on her lap like a much loved portrait.
Even now when I look at this piece, it really takes me back to those days and everything it took for us to meet, get together and finally be able to marry.
Not all online relationships work out, but I'm very happy that ours worked out so well.
Sunday, April 6, 2014
Spring in Texas means it's Bluebonnet time!
It's a chilly, drizzly, bleak day today. Not the sort of day we expect here in Texas in springtime.
I'm not complaining though, because my garden loving the soft gentle rain we're getting. After two years of drought conditions, I won't complain about rain ever again!
The cold winter we had this year, along with the lifegiving rains we are getting now, seem to have had a positive effect on the wildflowers for which Texas is famed. Even just driving along the freeway on my homeward commute, I smiled as I saw the medians swathed in bluebonnets, Indian paintbrushes and other beauties.
The past couple of years were not easy on wildflowers and the patches of color were smaller, sparser and further apart than in previous years. This year is looking to be a good year for the native flora of Texas.
I had long wanted to create a scene with bluebonnets in Vue, but was limited by the plant models available. Then I came across a way to make my own bluebonnets for use in Vue, by taking a photo of a single bluebonnet, making a mask with it and applying it to an "alpha plane".
Without going in to too much detail, this essentially creates a little "billboard" that you can place in your scene as part of the ecosystem, which contains all the grasses and plants in the scene..
If you click on the image below, you can see a larger view and you can see how many bluebonnets there are -- see all those blue dots? Each dot represents a single bluebonnet on an alpha plane, oriented toward the "camera" (the point at which the scene is viewed from) for best effect.
OK - so it's not a 3D model of a bluebonnet, but I think the effect is pretty good in the finished picture. You can click on the image below for a larger version.
I'm not complaining though, because my garden loving the soft gentle rain we're getting. After two years of drought conditions, I won't complain about rain ever again!
The cold winter we had this year, along with the lifegiving rains we are getting now, seem to have had a positive effect on the wildflowers for which Texas is famed. Even just driving along the freeway on my homeward commute, I smiled as I saw the medians swathed in bluebonnets, Indian paintbrushes and other beauties.
The past couple of years were not easy on wildflowers and the patches of color were smaller, sparser and further apart than in previous years. This year is looking to be a good year for the native flora of Texas.
I had long wanted to create a scene with bluebonnets in Vue, but was limited by the plant models available. Then I came across a way to make my own bluebonnets for use in Vue, by taking a photo of a single bluebonnet, making a mask with it and applying it to an "alpha plane".
Without going in to too much detail, this essentially creates a little "billboard" that you can place in your scene as part of the ecosystem, which contains all the grasses and plants in the scene..
If you click on the image below, you can see a larger view and you can see how many bluebonnets there are -- see all those blue dots? Each dot represents a single bluebonnet on an alpha plane, oriented toward the "camera" (the point at which the scene is viewed from) for best effect.
OK - so it's not a 3D model of a bluebonnet, but I think the effect is pretty good in the finished picture. You can click on the image below for a larger version.
Sunday, January 26, 2014
Painterly Pink Orchid - Fun with Textures
I spent some time yesterday going through photos from a trip to England in 2012. While on that trip we visited the Royal Horticultural Society flagship garden at Wisley. That place is a gardener's and a photographer's dream, and since I enjoy gardening and photography, I was in heaven!
One of the photos I liked was a photo of a beautiful pink orchid, taken in the glass house.
The photo on its own was a bit dark and flat, so this weekend I decided to try out some textures and blending techniques on it.
I'm getting quite the collection of textures now, and I tried out several with this image, viewing them side by side to see which one I really preferred. (It's really quite addictive!)
In the end I went with © Sisley from the Spring Painterly collection by Flypaper Textures, using the soft light blending mode. I really like how it lightens up the image and adds a painterly feel to it.
Now I'm going to have to play with some more photos from that trip and see what I can come up with :-)
One of the photos I liked was a photo of a beautiful pink orchid, taken in the glass house.
The photo on its own was a bit dark and flat, so this weekend I decided to try out some textures and blending techniques on it.
I'm getting quite the collection of textures now, and I tried out several with this image, viewing them side by side to see which one I really preferred. (It's really quite addictive!)
In the end I went with © Sisley from the Spring Painterly collection by Flypaper Textures, using the soft light blending mode. I really like how it lightens up the image and adds a painterly feel to it.
Now I'm going to have to play with some more photos from that trip and see what I can come up with :-)
Friday, December 27, 2013
Learning from Other Artists and Preparing for the New Year
On December 21st, I participated in the Fantasy Art Land Show at JoMar Visions in Houston. I really enjoyed the day, met some great artists and learned a lot that I can use at future shows.
The first thing I learned - I need more inventory. I had been concerned about keeping in the theme of the show and so only took the new fantasy art I've created recently - amounting to three framed prints and some unframed prints of the same images. They did look rather lonely in my display area.
Chatting with the other artists, I asked about this and they told me that generally it's fine to have other types of art available as unframed prints in your print rack, just as long as your main display adheres to the theme of the show.
One of the photographers at the show shared a resource with us that I am definitely going to use in the future - CGProPrints.com - a division of Circle Graphics, Inc., the largest producer of digital large-format prints. They bring together world-class manufacturing expertise, engineering, and materials science to produce amazing products at very low prices, which is perfect for artists building a body of work for sale or exhibition, like me :-)
We also discussed our marketing materials, business cards etc. I think I'm on the right track with my business cards. I got lots of compliments on it :-)
Another of the artists had something I thought was a good idea. In among her framed art and canvases on her wall, she had a 10 x 8 canvas with her name, web address and some decorative accents. So I played around a bit and created three different images that I am getting printed on 10 x 8 canvas to use when I go to more shows.
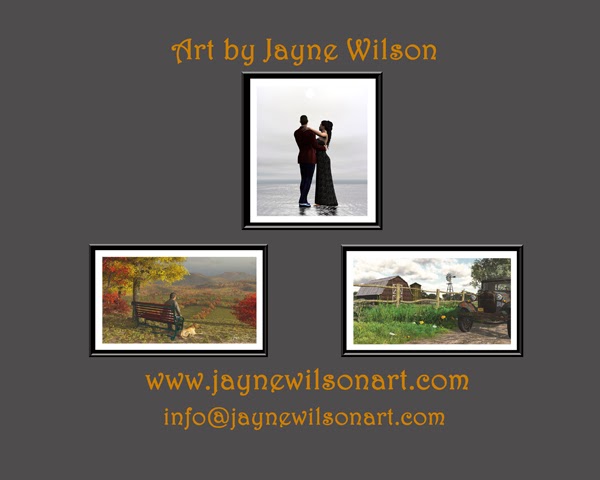
Here is the first one, which matches my business cards and rack cards, with the web address of my artist website and my email address.
And then I did another one, specifically for my fantasy art, which goes with the postcards I already had printed. It includes the web address of my new store on Zazzle which I opened recently.
And finally, I did a sign for my 3D Designs by Jayne store on Zazzle, with the tag line "Because art doesn't just belong on walls." The coloring and design match the header for the store and also for my 3DDesignsbyJayne Google + page.
So I think I'm ready for the New Year. I'll be able to order canvases to take to shows and sales without breaking the bank, and my marketing materials are coming together.
Here's to a Happy, Creative and Prosperous New Year!
What have you been doing to prepare for the New Year?
The first thing I learned - I need more inventory. I had been concerned about keeping in the theme of the show and so only took the new fantasy art I've created recently - amounting to three framed prints and some unframed prints of the same images. They did look rather lonely in my display area.
Chatting with the other artists, I asked about this and they told me that generally it's fine to have other types of art available as unframed prints in your print rack, just as long as your main display adheres to the theme of the show.
One of the photographers at the show shared a resource with us that I am definitely going to use in the future - CGProPrints.com - a division of Circle Graphics, Inc., the largest producer of digital large-format prints. They bring together world-class manufacturing expertise, engineering, and materials science to produce amazing products at very low prices, which is perfect for artists building a body of work for sale or exhibition, like me :-)
We also discussed our marketing materials, business cards etc. I think I'm on the right track with my business cards. I got lots of compliments on it :-)
Another of the artists had something I thought was a good idea. In among her framed art and canvases on her wall, she had a 10 x 8 canvas with her name, web address and some decorative accents. So I played around a bit and created three different images that I am getting printed on 10 x 8 canvas to use when I go to more shows.
Here is the first one, which matches my business cards and rack cards, with the web address of my artist website and my email address.
And then I did another one, specifically for my fantasy art, which goes with the postcards I already had printed. It includes the web address of my new store on Zazzle which I opened recently.
And finally, I did a sign for my 3D Designs by Jayne store on Zazzle, with the tag line "Because art doesn't just belong on walls." The coloring and design match the header for the store and also for my 3DDesignsbyJayne Google + page.
So I think I'm ready for the New Year. I'll be able to order canvases to take to shows and sales without breaking the bank, and my marketing materials are coming together.
Here's to a Happy, Creative and Prosperous New Year!
What have you been doing to prepare for the New Year?
Subscribe to:
Posts (Atom)