I'm thrilled to announce that I have received an Award of Excellence and three Special Recognition Awards in the "18th Annual Collage, Digital & Mixed Media Juried Online International Art Exhibition.hosted by Upstream People Gallery of Omaha, Nebraska.
The winning entries were selected by the juror Laurence Bradshaw, Professor Emeritus of Art at the University of Nebraska at Omaha, U. S. A.
Here is what Professor Bradshaw had to say about my work:
"'JAYNE WILSON of Tomball, Texas is a star digital artist as seen in all her works. These were all created using digital models, textures and lighting in the digital program DAZ 3D.
The piece "Vintage Photo Studio" shows a very handsome woman sitting comfortably on a period chaise lounge sofa. The overall warmth and tone of the picture adds to the vintage character.
Her "The Indian Pony", another digital rendering on canvas, is very handsome. The brown horse's head with the spotted body of the horse is something that rendering helps to create and here it works quite well.
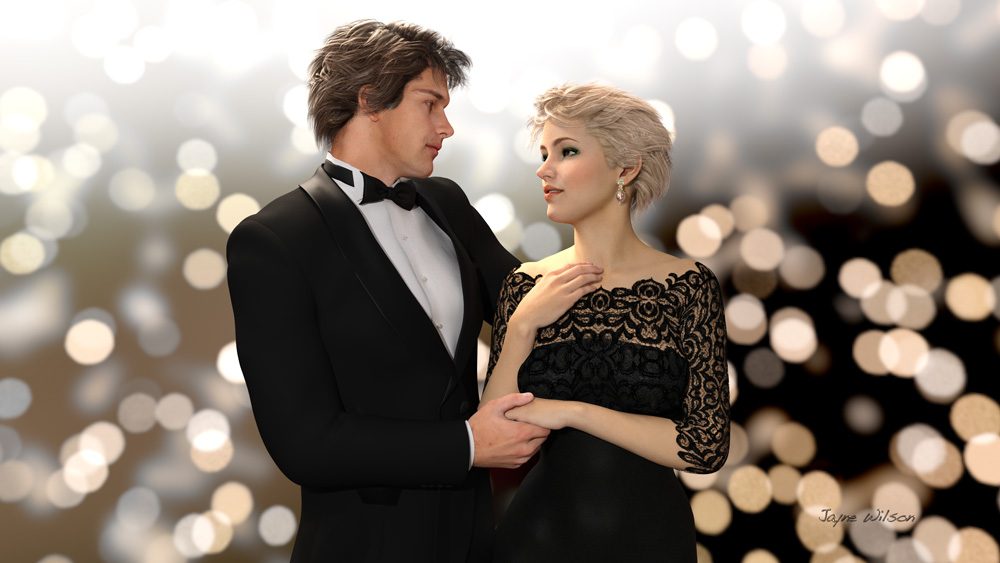
"A Night on the Town" captures a handsome rendering of a woman and man dressed to impress. The background really sparks the awesomeness of the two together.
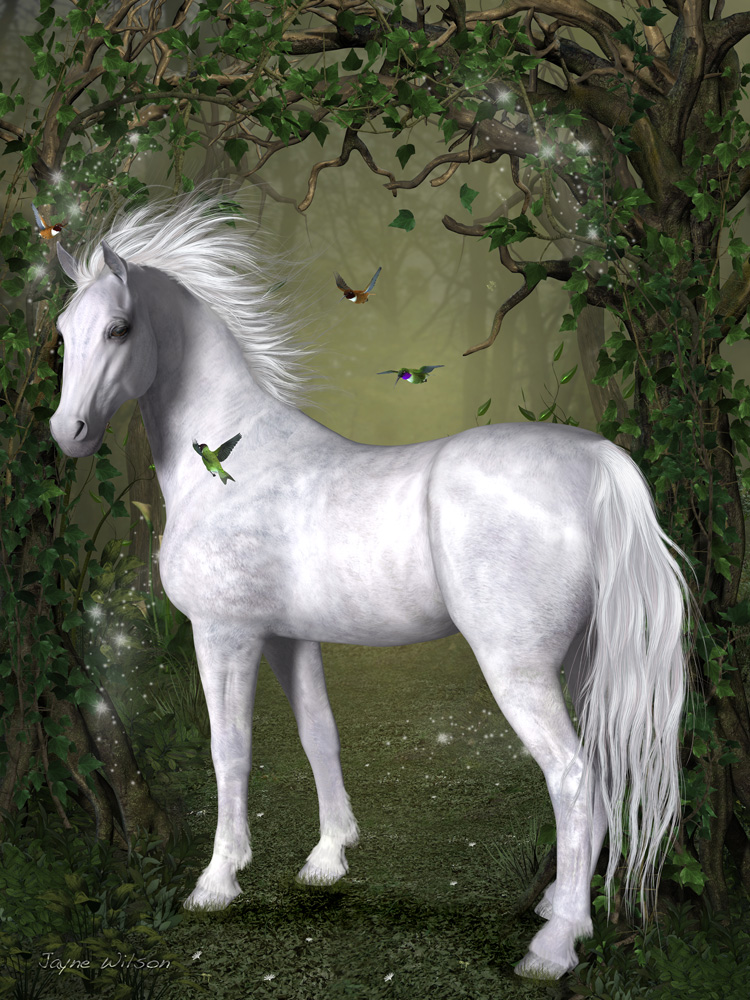
Also, "White Horse in the Forest" shows her talent with the beautiful horse center stage with the scraggling tree limbs which is a nice contrast to the smooth body of the horse. And the little gentle birds add a lightness to the mood."'
I would like to thank Professor Bradshaw for this recognition and for his kind words about my work.
The exhibition will be featured online during May, 2016 at www.upstreampeoplegallery.com and continue indefinitely in the archives section of the website.
Additional information may be downloaded from the virus-free links below:
The Indian Pony - Award of Excellence - http://bit.ly/21I06Lg
Vintage Photo Studio - Special Recognition - http://bit.ly/1WgCCgU
A Night on the Town - Special Recognition - http://bit.ly/24AYuIi
White Horse in the Forest - Special Recognition - http://bit.ly/24DyXej
Showing posts with label digital artist. Show all posts
Thursday, May 12, 2016
Saturday, January 10, 2015
The Making of "Rainy Day at the Lake"
It's a cold, wet, dreary day in Texas. The sort of day to curl up on the sofa and read a book, or do some artwork, or watch a movie!
It got me thinking about a 3D digital artwork I created some time ago called "Rainy Day at the Lake."
I wanted a typical English scene - a cloudy, rainy day, with a family of ducks paddling across a pond in the driving rain.
Here's the image. It's been popular on mousepads and cards in my Zazzle store, and it's also available on canvas and as prints at www.jaynewilsonart.com
I thought I would get my blog started up again this year by showing how the image was made, the steps it took to create it.
The main detail of this scene would be the lake. My vision was to have a grassy foreground, the lake in the middle ground and the far bank, with some trees and a house in the background and a stone bridge on the right, providing access to the house. To create the lake I added a standard terrain and began "excavating."
I'm still learning how to manipulate terrains but I knew this one didn't have to be too detailed, because of the viewpoint of the camera. All that would be seen would be the far bank. Everything else would be out of the view of the camera.
Then I added a water plane and applied a material, one of a purchased set with the effect of rain drops on the water surface.
The next thing to do was to add the atmosphere for which I used Vue's versatile Atmosphere editor and selected one of the stock atmospheres. As usual I made some minor tweaks to get the general look I wanted.
Then I went about adding that rain. This was done by creating a cylinder object, to which I added a transparent mat that I created in Photoshop Elements with my raindrops "painted" on it. This was centered over the camera, so the camera was actually looking through it to the rest of the scene. I rotated it on the x axis to give the rain a bit of a slant.
Once I had the terrains and atmosphere done, I added the other elements, such as the house and the bridge. These were purchased models which I then resized and positioned along the x, y and z axis using the "gizmos" in Vue until they were where I wanted them, and in proportionate size.
The next step is adding the vegetation -- trees, plants, grasses. This can either be done by applying an Ecostyem to an entire terrain, or by painting the ecosystem only where it is needed.
As my system gets bogged down by huge ecosystems that populate the entire scene, I usually use the latter option and just paint them where needed. This can be done individually or with an airbrush type of effect.
It got me thinking about a 3D digital artwork I created some time ago called "Rainy Day at the Lake."
I wanted a typical English scene - a cloudy, rainy day, with a family of ducks paddling across a pond in the driving rain.
Here's the image. It's been popular on mousepads and cards in my Zazzle store, and it's also available on canvas and as prints at www.jaynewilsonart.com
I thought I would get my blog started up again this year by showing how the image was made, the steps it took to create it.
I created it in Vue, by e-On Software, a 3D digital art program.
As you work in Vue, the workspace is divided into four panes, each giving a different view of your scene.
The top right hand pane is the view from the top - useful for placing one element behind another. From above, you can see dotted lines, which show the visual scope of the
"camera" (the point from which the image is rendered).
The area within those lines will be in your render, so you need
to make sure everything is well placed. Outside those lines, it
doesn't matter and you can keep the file size down by not populating
those area with lots of detail such as trees, grass etc.
Top View
Additional windows show you views from the front and from the side. All these view aid in placing objects within the 3D environment that Vue creates inside your computer. The bottom right hand pane shows you the camera view, this is how your final render will look.
Vue Workspace
The main detail of this scene would be the lake. My vision was to have a grassy foreground, the lake in the middle ground and the far bank, with some trees and a house in the background and a stone bridge on the right, providing access to the house. To create the lake I added a standard terrain and began "excavating."
Terrain Editor
I'm still learning how to manipulate terrains but I knew this one didn't have to be too detailed, because of the viewpoint of the camera. All that would be seen would be the far bank. Everything else would be out of the view of the camera.
Then I added a water plane and applied a material, one of a purchased set with the effect of rain drops on the water surface.
The next thing to do was to add the atmosphere for which I used Vue's versatile Atmosphere editor and selected one of the stock atmospheres. As usual I made some minor tweaks to get the general look I wanted.
Then I went about adding that rain. This was done by creating a cylinder object, to which I added a transparent mat that I created in Photoshop Elements with my raindrops "painted" on it. This was centered over the camera, so the camera was actually looking through it to the rest of the scene. I rotated it on the x axis to give the rain a bit of a slant.
Once I had the terrains and atmosphere done, I added the other elements, such as the house and the bridge. These were purchased models which I then resized and positioned along the x, y and z axis using the "gizmos" in Vue until they were where I wanted them, and in proportionate size.
The next step is adding the vegetation -- trees, plants, grasses. This can either be done by applying an Ecostyem to an entire terrain, or by painting the ecosystem only where it is needed.
As my system gets bogged down by huge ecosystems that populate the entire scene, I usually use the latter option and just paint them where needed. This can be done individually or with an airbrush type of effect.
Ecosystem
You can see the red dots indicating the locations of the trees and grasses in this screen shot. As you can see in the top left pane, I only placed them within the dotted lines indicated the field of vision of the camera -- much easier for my computer to handle!
At this point it becomes a case of making test or preview renders, then making adjustments as necessary until I'm happy with the scene. I usually do lots of test renders and then, when I think it's complete, I usually do one more because I always seem to find a glaring error staring me right in the face!
But eventually I get to the point where I am happy with the finished image and can do a final render.
I hope you have enjoyed this glimpse at the world of the 3D artist.
Saturday, July 6, 2013
Digital Artists Who Inspire Me
There are a number of online communities for digital artists: Deviant Art, Renderosity, Cornucopia 3D to name but three.
Each site has hundreds, if not thousands of member artists, many of whom inspire others and give of themselves by creating tutorials for other artists, and also providing content, such as materials and backgrounds, for others to use in their own work.
This week, I thought I would share with you three of my favorite digital artists.
Gill Brooks
Digital artists not only have to have the normal artistic skills such as composition and a sense of proportion and perspective, but they also have to learn the technical aspects of working with which ever program they use. Gill, who hails from England, has been working in Vue since 2002, long before I had ever heard of it.
I love her work, some of which is fantasy art, such as the image I have shown above, called "Follow Me" and some is inspired by the scenery and landscapes of England.
I have some materials created by Gill in my own "digital toolbox", in the form of some very realistic water textures that I have used in a number of my own pieces.
You can view Gill's portfolio on Cornucopia here.
You can view her gallery on Renderosity here.
Dominic Davison
Another English artist I admire is Dominic Davison. His works make me think of a digital version of Thomas Kinkade. His attention to the smallest detail and the quality of his lighting make every one of his images picture perfect.
Even when I use the exact same 3D models in my own art, I can't get anywhere near this quality yet, but I'll keep trying!
You can view Dominic's portfolio on Cornucopia here.
You can view his gallery on Renderosity here.
Flint_Hawk
I don't know what Flint_Hawk's real name is, just the "handle" they go by on Renderosity. I'm not even sure if it's a he or a she!!
Flint_Hawk does some wonderful fantasy art in Poser, and a lot of it includes horses - my favorite subject!.
As with many of the artists on Renderosity, Flint-Hawk helpfully posts details of how they composed their image, which textures they use, details of any extra models they have used and where one can get them.
Renderosity members can view Flint-Hawks's gallery by searching for Flint_Hawk at www.renderosity.com. The artist asked me not to post a direct link.
Each of these artists, as well as many others, have inspired me in my art. Which could be why I don't seem to have my own unique style... but that's another blog post.
Which artists have inspired you?
Each site has hundreds, if not thousands of member artists, many of whom inspire others and give of themselves by creating tutorials for other artists, and also providing content, such as materials and backgrounds, for others to use in their own work.
This week, I thought I would share with you three of my favorite digital artists.
Gill Brooks
Digital artists not only have to have the normal artistic skills such as composition and a sense of proportion and perspective, but they also have to learn the technical aspects of working with which ever program they use. Gill, who hails from England, has been working in Vue since 2002, long before I had ever heard of it.
I love her work, some of which is fantasy art, such as the image I have shown above, called "Follow Me" and some is inspired by the scenery and landscapes of England.
I have some materials created by Gill in my own "digital toolbox", in the form of some very realistic water textures that I have used in a number of my own pieces.
You can view Gill's portfolio on Cornucopia here.
You can view her gallery on Renderosity here.
Dominic Davison
Another English artist I admire is Dominic Davison. His works make me think of a digital version of Thomas Kinkade. His attention to the smallest detail and the quality of his lighting make every one of his images picture perfect.
Even when I use the exact same 3D models in my own art, I can't get anywhere near this quality yet, but I'll keep trying!
You can view Dominic's portfolio on Cornucopia here.
You can view his gallery on Renderosity here.
Flint_Hawk
I don't know what Flint_Hawk's real name is, just the "handle" they go by on Renderosity. I'm not even sure if it's a he or a she!!
Flint_Hawk does some wonderful fantasy art in Poser, and a lot of it includes horses - my favorite subject!.
As with many of the artists on Renderosity, Flint-Hawk helpfully posts details of how they composed their image, which textures they use, details of any extra models they have used and where one can get them.
Renderosity members can view Flint-Hawks's gallery by searching for Flint_Hawk at www.renderosity.com. The artist asked me not to post a direct link.
Each of these artists, as well as many others, have inspired me in my art. Which could be why I don't seem to have my own unique style... but that's another blog post.
Which artists have inspired you?
Sunday, June 2, 2013
The Making of Dance With Me
When Light, Space and Time Gallery announced their 3rd annual "Figurative" competition, I was hesitant to enter. I wasn't sure that anything in my portfolio would fit the criteria, but then I remembered "Dance with Me", which I did in 2010.
I had fallen in love with Jack Vettriano's "Dance me to the End of Love" and set about the task of creating a piece with a similar atmosphere to it, using the 3D graphics programs that I was now working with.
It was done in two parts: the background image was created in Bryce 3D and the figures were done in DAZ 3D.
In Bryce, I worked on the ground plane to get a texture that would look similar to the infinite plane the dancers in Vettriano's original were dancing on.
I ended up using a water plane to get the effect I was after. My dancers are literally dancing on water, lol.
Then I played in the atmosphere editor, positioning the sun and changing the parameters to get the overall color I wanted, and the layer of haze on the horizon.
When I had the background the way I wanted it, I rendered it in Bryce and saved it as a jpeg file that could be used as a backdrop in DAZ 3D.
Now came the really fun part - dressing and posing my 3D characters to recreate the scene and capture the atmosphere of the original.
Since the characters start out in the position shown below (only naked), you can see that quite a bit of work is involved in this step!
Posing a single character in DAZ is fairly easy, even easier if you use one of the many pre-set poses available. But posing and positioning two characters in a 3D environment, viewed on your 2D computer screen, offers lots of challenges.
For example, when viewed from the front, you might position your characters to be close together as if they were dancing, but then look at them from above and see that they are actually quite some distance apart from one another. The same can happen if you look from the left or the right too.
So as you work and pose and create your scene, you have to constantly view the scene from all directions to make sure everything is working together.
Eventually, I got my dancers the way I wanted them, as close as I could get them to the dancers in Vettriano's original. Then I adjusted the lighting to blend with the atmosphere on the background and clicked on RENDER.
Finally I did a little bit of post work in Photoshop Elements - I used the dodge/burn tool to give the illusion of a reflection of the dancers and anchor them to the ground plane, then it was finished.
So, going back to the beginning of my post, when I got the notice about the "Figurative" art competition in April, I went ahead and sent in my entry to Light, Space and Time and now I'm very happy to announce that "Dance with Me" earned a Special Recognition Award!!
The competition received 592 entries from 23 different countries from around the world so you can see how much of an honor this is for me!
All of the winners can be seen here. My thanks to John Rath for his work in running the Light, Space and Time online gallery and for giving artists like myself the opportunity to participate in competitions and be included in exhibitions.
I had fallen in love with Jack Vettriano's "Dance me to the End of Love" and set about the task of creating a piece with a similar atmosphere to it, using the 3D graphics programs that I was now working with.
It was done in two parts: the background image was created in Bryce 3D and the figures were done in DAZ 3D.
In Bryce, I worked on the ground plane to get a texture that would look similar to the infinite plane the dancers in Vettriano's original were dancing on.
I ended up using a water plane to get the effect I was after. My dancers are literally dancing on water, lol.
Then I played in the atmosphere editor, positioning the sun and changing the parameters to get the overall color I wanted, and the layer of haze on the horizon.
When I had the background the way I wanted it, I rendered it in Bryce and saved it as a jpeg file that could be used as a backdrop in DAZ 3D.
Now came the really fun part - dressing and posing my 3D characters to recreate the scene and capture the atmosphere of the original.
Since the characters start out in the position shown below (only naked), you can see that quite a bit of work is involved in this step!
Posing a single character in DAZ is fairly easy, even easier if you use one of the many pre-set poses available. But posing and positioning two characters in a 3D environment, viewed on your 2D computer screen, offers lots of challenges.
For example, when viewed from the front, you might position your characters to be close together as if they were dancing, but then look at them from above and see that they are actually quite some distance apart from one another. The same can happen if you look from the left or the right too.
So as you work and pose and create your scene, you have to constantly view the scene from all directions to make sure everything is working together.
Eventually, I got my dancers the way I wanted them, as close as I could get them to the dancers in Vettriano's original. Then I adjusted the lighting to blend with the atmosphere on the background and clicked on RENDER.
Finally I did a little bit of post work in Photoshop Elements - I used the dodge/burn tool to give the illusion of a reflection of the dancers and anchor them to the ground plane, then it was finished.
So, going back to the beginning of my post, when I got the notice about the "Figurative" art competition in April, I went ahead and sent in my entry to Light, Space and Time and now I'm very happy to announce that "Dance with Me" earned a Special Recognition Award!!
The competition received 592 entries from 23 different countries from around the world so you can see how much of an honor this is for me!
All of the winners can be seen here. My thanks to John Rath for his work in running the Light, Space and Time online gallery and for giving artists like myself the opportunity to participate in competitions and be included in exhibitions.
Sunday, December 30, 2012
The Making of Winter Snowscape
The first 3D art program that I used was Bryce, by DAZ Productions.
My husband Eric introduced me to it and I was thrilled that here was something I could use to create art that the cats couldn't get into and mess up and they seemed to manage to do with other arts and crafts projects!
Eric's sister, Michele, also uses Bryce for her art and I noticed right away that she was a very prolific artist. This inspired me to learn all I could about the program and start creating in it!
I spent a lot of time over the Christmas season on 2007 listening to Jethro Tull's Christmas Album. It's still one of my favorites but then it was even more special as it had been the first Christmas gift Eric had bought for me, before we were married. Since he was travelling on business that Christmas (bummer) I listened to that album almost 24/7 as a way of keeping Eric near.
I really loved the cover art of that album. As I listened, I began to wonder if I could recreate the scene, or at least evoke the feel of it, in my newfound obsession, Bryce.
So I started out by opening a scene with the default ground and sky in Bryce. Then I had to consider where to get or create a building that looked similar to the one on the album cover. Bryce comes with landscape features built-in -- the terrains, atmosphere and texture editors. But it doesn't have any man made objects - they have to be purchased, or obtained as "freebies" from one of the 3D art content providers.
I found this one as a freebie at 3D Commune, which sadly is no longer online. I felt it had promise, but obviously, I was going to need to either find or make a texture for it.
I was able to find a texture that simulated the brickwork. I still would have to find/make a "snowy" texture for the roof parts and perhaps have some lights glowing at the windows.
But first I needed to make the scenery look a bit more wintery. I added some basic mountain terrains and moved them to the back of the scene, and added a snowy texture to the ground plane.
In this one, you can see I've added some snow to the roof parts of the building. It gets a little tricky adding textures to these 3D models because you have to identify, out of the hundreds of meshes that make up the whole object, which ones are which. It's especially difficult if the parts are named in a foreign language.
Here, I've located all the windows in the mesh and applied a yellow glow and I've also started working on the atmosphere to try and come close, or at least get the same feel, as the inspiration piece.
I continued to tweak the atmosphere and I also added some more houses, all objects found free at Renderosity or 3D Commune.
To add a little more detail to the scene, I added some trees - both pine trees and leafless winter trees - to fill out the scene and make it look more complete.
I might have decided to call it finished at this point, but I had been doing quite a bit of work in another 3D program, DAZ|Studio, also by DAZ Productions, and it offered me a chance to do something I hadn't been able to do in Bryce up to that point -- add people to my scenes.
Whereas Bryce is specifically for creating digital landscapes, DAZ|Studio is a program in which you can create characters for your scenes by using 3D models to which you add textures and clothing and then pose them. Scenes can be rendered within DAZ|Studio, using a photographic backdrop for the 3D models, or the models themselves can be exported and used in programs such as Bryce and Vue, which is what I did here.
Looking back on this now, I see I changed the atmosphere again. Not sure I like this version, it's too yellow to my eye, I prefer the previous version, but this was the one I went with in the end.
I added some more characters, as well as a horse and sleigh (which I really had fun creating in DAZ|Studio) and that was it, finished.
Of course, it's difficult to see the detail in these small images, so you can click on this one to see a larger version of the finished render.
As I said at the beginning of this post, I was inspired by the cover artwork on Jethro Tull's Christmas Album.
Do you think I captured the essence and feel of it?
My husband Eric introduced me to it and I was thrilled that here was something I could use to create art that the cats couldn't get into and mess up and they seemed to manage to do with other arts and crafts projects!
Eric's sister, Michele, also uses Bryce for her art and I noticed right away that she was a very prolific artist. This inspired me to learn all I could about the program and start creating in it!
I spent a lot of time over the Christmas season on 2007 listening to Jethro Tull's Christmas Album. It's still one of my favorites but then it was even more special as it had been the first Christmas gift Eric had bought for me, before we were married. Since he was travelling on business that Christmas (bummer) I listened to that album almost 24/7 as a way of keeping Eric near.
I really loved the cover art of that album. As I listened, I began to wonder if I could recreate the scene, or at least evoke the feel of it, in my newfound obsession, Bryce.
So I started out by opening a scene with the default ground and sky in Bryce. Then I had to consider where to get or create a building that looked similar to the one on the album cover. Bryce comes with landscape features built-in -- the terrains, atmosphere and texture editors. But it doesn't have any man made objects - they have to be purchased, or obtained as "freebies" from one of the 3D art content providers.
I found this one as a freebie at 3D Commune, which sadly is no longer online. I felt it had promise, but obviously, I was going to need to either find or make a texture for it.
I was able to find a texture that simulated the brickwork. I still would have to find/make a "snowy" texture for the roof parts and perhaps have some lights glowing at the windows.
But first I needed to make the scenery look a bit more wintery. I added some basic mountain terrains and moved them to the back of the scene, and added a snowy texture to the ground plane.
In this one, you can see I've added some snow to the roof parts of the building. It gets a little tricky adding textures to these 3D models because you have to identify, out of the hundreds of meshes that make up the whole object, which ones are which. It's especially difficult if the parts are named in a foreign language.
Here, I've located all the windows in the mesh and applied a yellow glow and I've also started working on the atmosphere to try and come close, or at least get the same feel, as the inspiration piece.
I continued to tweak the atmosphere and I also added some more houses, all objects found free at Renderosity or 3D Commune.
To add a little more detail to the scene, I added some trees - both pine trees and leafless winter trees - to fill out the scene and make it look more complete.
I might have decided to call it finished at this point, but I had been doing quite a bit of work in another 3D program, DAZ|Studio, also by DAZ Productions, and it offered me a chance to do something I hadn't been able to do in Bryce up to that point -- add people to my scenes.
Whereas Bryce is specifically for creating digital landscapes, DAZ|Studio is a program in which you can create characters for your scenes by using 3D models to which you add textures and clothing and then pose them. Scenes can be rendered within DAZ|Studio, using a photographic backdrop for the 3D models, or the models themselves can be exported and used in programs such as Bryce and Vue, which is what I did here.
Looking back on this now, I see I changed the atmosphere again. Not sure I like this version, it's too yellow to my eye, I prefer the previous version, but this was the one I went with in the end.
I added some more characters, as well as a horse and sleigh (which I really had fun creating in DAZ|Studio) and that was it, finished.
Of course, it's difficult to see the detail in these small images, so you can click on this one to see a larger version of the finished render.
As I said at the beginning of this post, I was inspired by the cover artwork on Jethro Tull's Christmas Album.
Do you think I captured the essence and feel of it?
Thursday, December 27, 2012
What is 3D Art?
One of the difficult things I come up against when discussing my art is that many people have no concept of what 3D art is.
After all, the end result is a 2D image on a computer screen, or if you have it printed, on paper or canvas -- right?
So where does the "3D" come in?
Let me see if I can give you an idea of how it works. Please note that this is by no means a tutorial on 3D digital artwork. This is just so you know what I mean when I say I create 3D digital artwork.
The following relates to the program I use, Vue, but other 3D programs have the same sort of interface.
Whenever you open a new scene in Vue, the display shows four views of the scene -- Top View, Side View, Front View and Main Camera View. You can click on the image below to see it enlarged.
In to that scene, you load objects - which can be primitive shapes, such as this sphere, but also terrains, trees, buildings or anything else. Then you use the "gizmos" (the blue, green and red arrows in the above image) to move the objects along the x, y or z axis and position them within the 3D enviroment of Vue.
That's where the 3D part comes in. In addition to moving the terrains and other objects within the 3D environment on your screen, you can move the camera around and point it in different directions for different points of view.
Once you've loaded an object or terrain, you can apply a texture -- Vue comes with a lot of textures built in, but you can also create your own for a custom work, or purchase textures for use in Vue.
As you work, you can do "test renders" to see how things are progressing since the Main Camera view (bottom right on these images) doesn't give the full detail on work in progress.
As you can see in the image above, the lighting is coming from the right, so the shadows are to the left of the objects. But the lighting, like the textures, is totally customizable. You can change the atmosphere by loading one of the built-in pre-sets, or by going in to the Atmosphere Editor and changing the angle and direction of the sun, adding cloud layers etc.
And finally, you can set the quality of detail in your final render. The more detail, the longer the render time.
As I mentioned above, I use, Vue, by E-On Software. It's a very powerful software which offers different levels of functionality, from the hobbyist level to the CG professional - it has been used to create the scenery in movies such as Pirates of the Caribbean II, Avatar and Indiana Jones and the Crystal Skull, to name just a few.
I have the middle "artist" level, Vue Esprit, to which I added some extra modules for added bells and whistles. Naturally, shortly after I purchased Vue 9, they came out with Vue 10, which had some new features. And now they are on Vue 11. I'm still learning to use Vue 9, an upgrade will have to wait!
If you want to give it a try, you can download a fully functioning Personal Learning Edition - the only down side to the PLE is that after a certain amount of time, it places watermarks on your finished renders, and a logo in the corner.
One thing I didn't mention in the steps above is probably one of the most fun parts of working with Vue - the Ecosystem painter. I'll show you that in more detail on a future post but for now I will show you a finished work, created from start to finish in Vue, with no filters or other Photoshop tweaking. I titled this piece "Heartland" and it placed 4th in the Digital/Photography category and 7th in the Overall Winners Category at the Second Annual "Countryside" art competition at Light, Space and Time Online Gallery.
It is on permanent display in the November 2012 Countryside Art Exhibition.
After all, the end result is a 2D image on a computer screen, or if you have it printed, on paper or canvas -- right?
So where does the "3D" come in?
Let me see if I can give you an idea of how it works. Please note that this is by no means a tutorial on 3D digital artwork. This is just so you know what I mean when I say I create 3D digital artwork.
The following relates to the program I use, Vue, but other 3D programs have the same sort of interface.
Whenever you open a new scene in Vue, the display shows four views of the scene -- Top View, Side View, Front View and Main Camera View. You can click on the image below to see it enlarged.
In to that scene, you load objects - which can be primitive shapes, such as this sphere, but also terrains, trees, buildings or anything else. Then you use the "gizmos" (the blue, green and red arrows in the above image) to move the objects along the x, y or z axis and position them within the 3D enviroment of Vue.
That's where the 3D part comes in. In addition to moving the terrains and other objects within the 3D environment on your screen, you can move the camera around and point it in different directions for different points of view.
Once you've loaded an object or terrain, you can apply a texture -- Vue comes with a lot of textures built in, but you can also create your own for a custom work, or purchase textures for use in Vue.
As you work, you can do "test renders" to see how things are progressing since the Main Camera view (bottom right on these images) doesn't give the full detail on work in progress.
As you can see in the image above, the lighting is coming from the right, so the shadows are to the left of the objects. But the lighting, like the textures, is totally customizable. You can change the atmosphere by loading one of the built-in pre-sets, or by going in to the Atmosphere Editor and changing the angle and direction of the sun, adding cloud layers etc.
And finally, you can set the quality of detail in your final render. The more detail, the longer the render time.
As I mentioned above, I use, Vue, by E-On Software. It's a very powerful software which offers different levels of functionality, from the hobbyist level to the CG professional - it has been used to create the scenery in movies such as Pirates of the Caribbean II, Avatar and Indiana Jones and the Crystal Skull, to name just a few.
I have the middle "artist" level, Vue Esprit, to which I added some extra modules for added bells and whistles. Naturally, shortly after I purchased Vue 9, they came out with Vue 10, which had some new features. And now they are on Vue 11. I'm still learning to use Vue 9, an upgrade will have to wait!
If you want to give it a try, you can download a fully functioning Personal Learning Edition - the only down side to the PLE is that after a certain amount of time, it places watermarks on your finished renders, and a logo in the corner.
One thing I didn't mention in the steps above is probably one of the most fun parts of working with Vue - the Ecosystem painter. I'll show you that in more detail on a future post but for now I will show you a finished work, created from start to finish in Vue, with no filters or other Photoshop tweaking. I titled this piece "Heartland" and it placed 4th in the Digital/Photography category and 7th in the Overall Winners Category at the Second Annual "Countryside" art competition at Light, Space and Time Online Gallery.
It is on permanent display in the November 2012 Countryside Art Exhibition.
Subscribe to:
Posts (Atom)